You guys, I am SO excited about this project!
We have been trying to stay indoors as much as possible with the fires on the West Coast have created a ton of smoke hanging over our area of WA State. Air quality has not been great, so I’ve worn my mask when I pick tomatoes and zucchini, and have done a lot of cooking and crafting the past few days.
I have made a few different yarn wall hangings over the years but this one is my favorite so far!

You can make this as small or grand as you like, I wanted mine to be big enough to have a pretty impact but small enough I can hang it on my front door.
First, the mustard color.

You know how every once in a while you get a full on obsession with a color and you lose your dang mind every time you see ANYTHING in that color?
Yeah, that is pretty much the case with me and mustard right now, it’s my jam and I am loving it.
I have been moving stuff around and fluffing our nest, loving the crisp mornings and winding down that fall brings each year.
Enter, a new quick yarn DIY and we are in full fall mode up in here!

Y’all this is SO easy, I bought two skeins of yarn from JoAnn’s, and spray-painted a little metal rod I found in our garage (I am really hoping doesn’t go with something, we will find out!) with copper spray paint. Grab some scissors and you are ready to create.
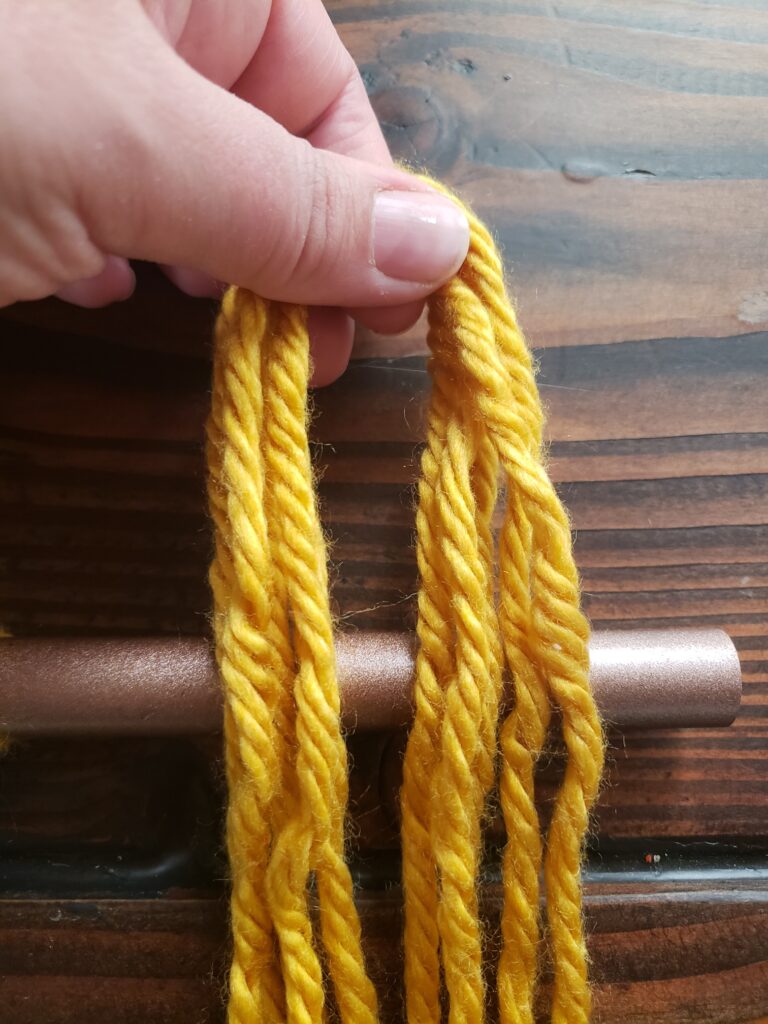
I did not measure each section of yarn but instead stretched my arms as wide as they would go and used that for each section. Then going back eight times I had a nice yarn “rope” to then tie around the metal rod.


I alternated colors and then went back and cut the loops at the bottom so they were all lose. Towards the end they were also very crimped being in the center of the skein so I used my fabric steamer to gently get each section to relax and match the others.

Next you just create a pattern, starting at the left I tied half of the first bundle of yarn into a knot, next I used the remaining half of that bundle and have of the next bundle to create a pattern across the first row. Next row is the opposite and the knots were complete. Lastly, I smoothed out the yarn on a flat surface and trimmed each side into the triangular pattern across the bottom.

One piece of yarn at the top to create the hanger, and we are done!

I am loving how quick this was to put together and the impact for a project that took less than 30 minutes!

Thank you as always for reading friend, I hope this finds you well and finding a bit of time in your day to create. Until our next project 🙂
xo, Tanya


2 Responses
Looks great for fall on your door!
Thank you Cindy, I am really loving it, so ready for all the fall feels! 🙂