I don’t know about you but I am sooooo ready for warmer weather, longer days, and FLOWERS!
I love to plant grasses & flowers around our patio and porch and cluster them together here and there.
They are so easy to take care of and I like how many different groupings I can put together with containers of different height and size.
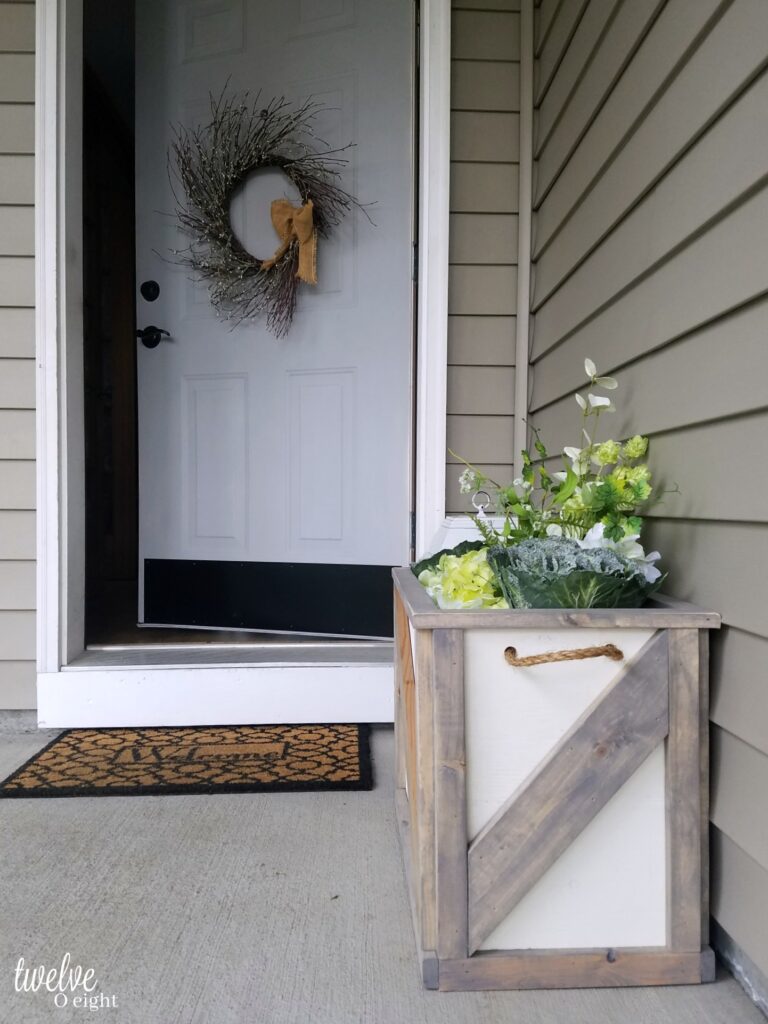
We recently wanted to make a new catch all box to go by our back door for shoes, but we ended up making this pretty big.
And so it’s smaller cousin will be by the back door full of flip flops etc..
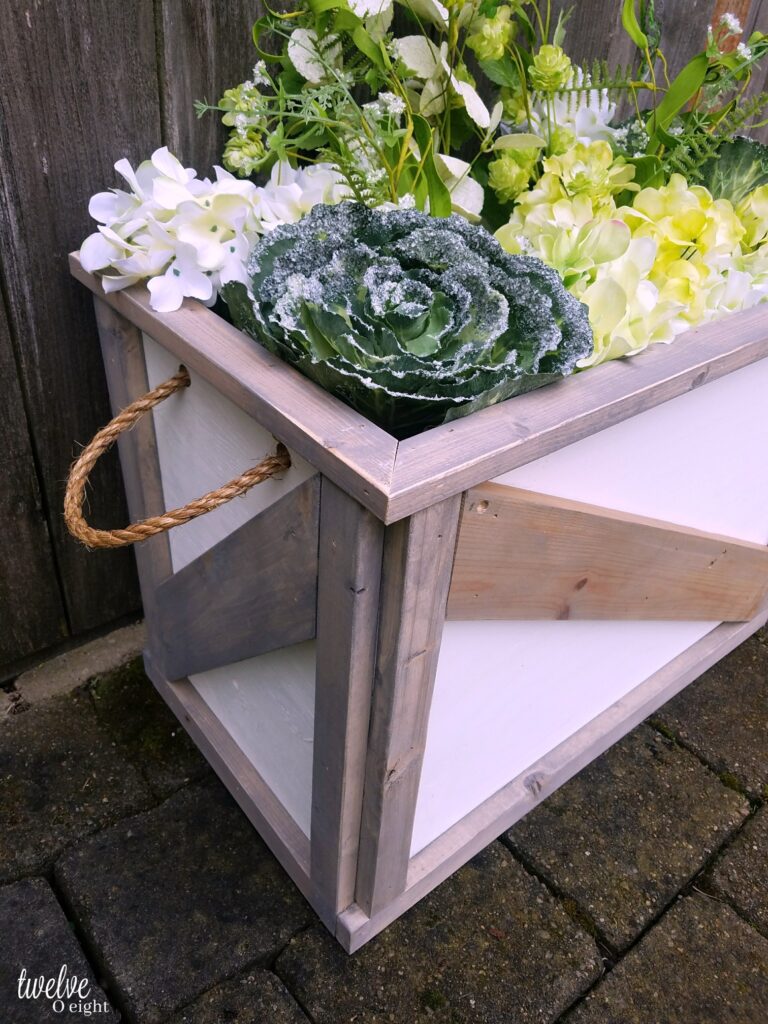
And this lovely lady (who holds some faux plants now but not for long) will be the new home to a grouping of topiaries I have had my eye on.
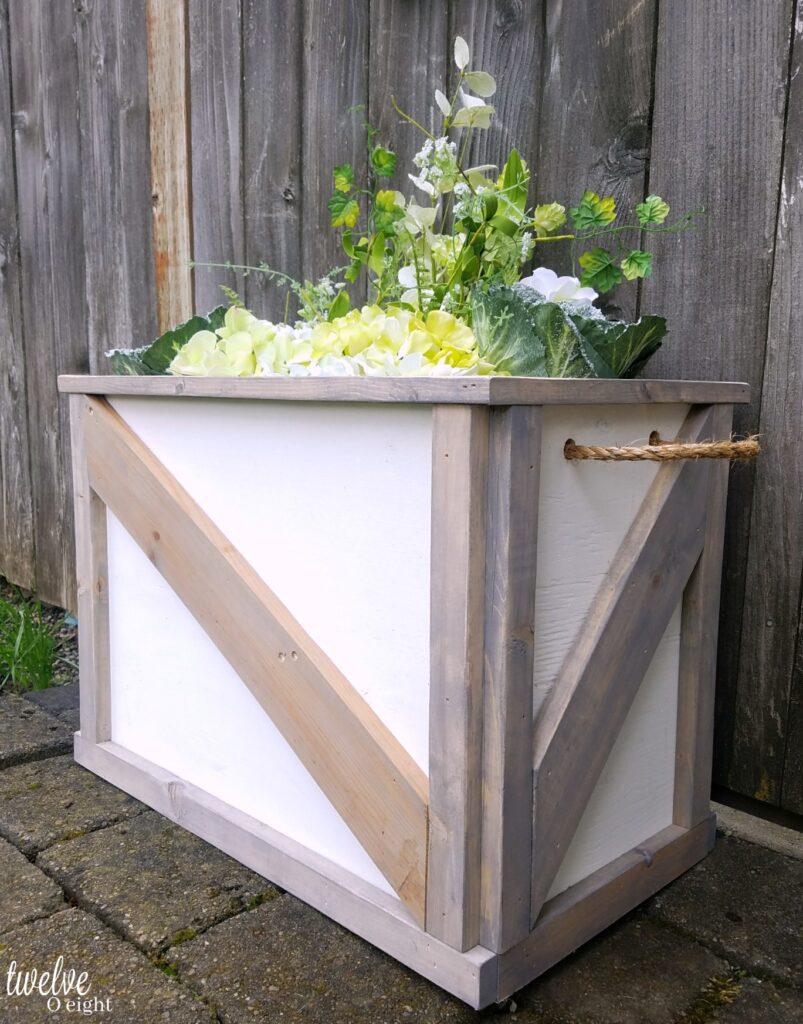
Here is what we used to make this rustic barn door style planter.
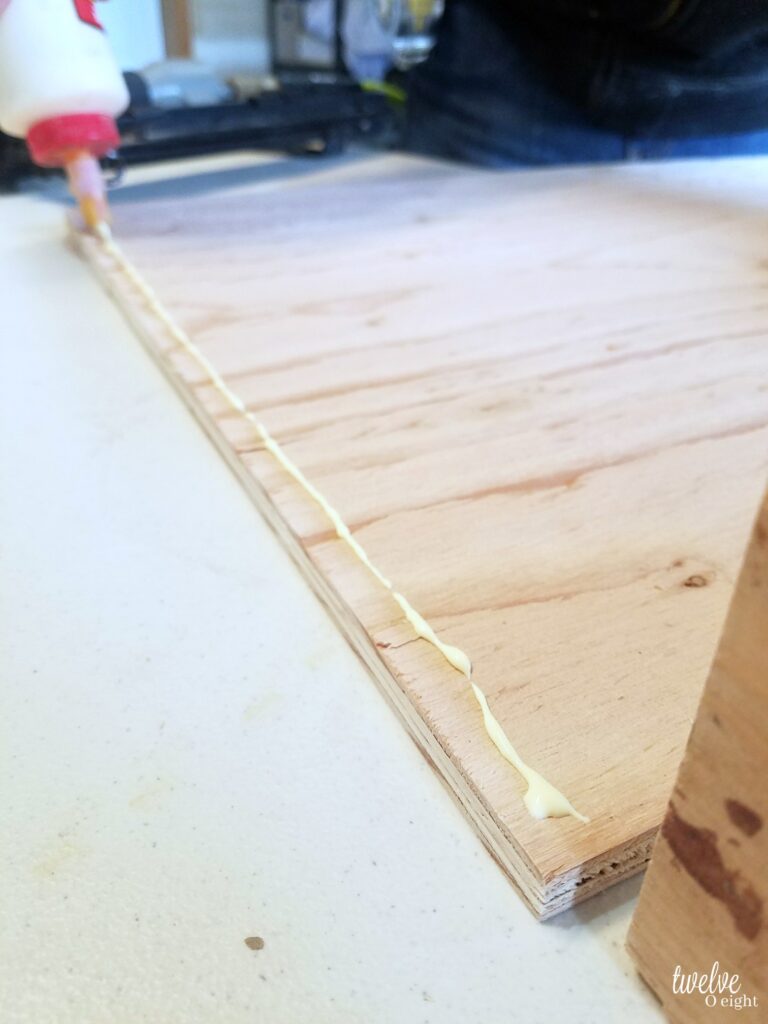
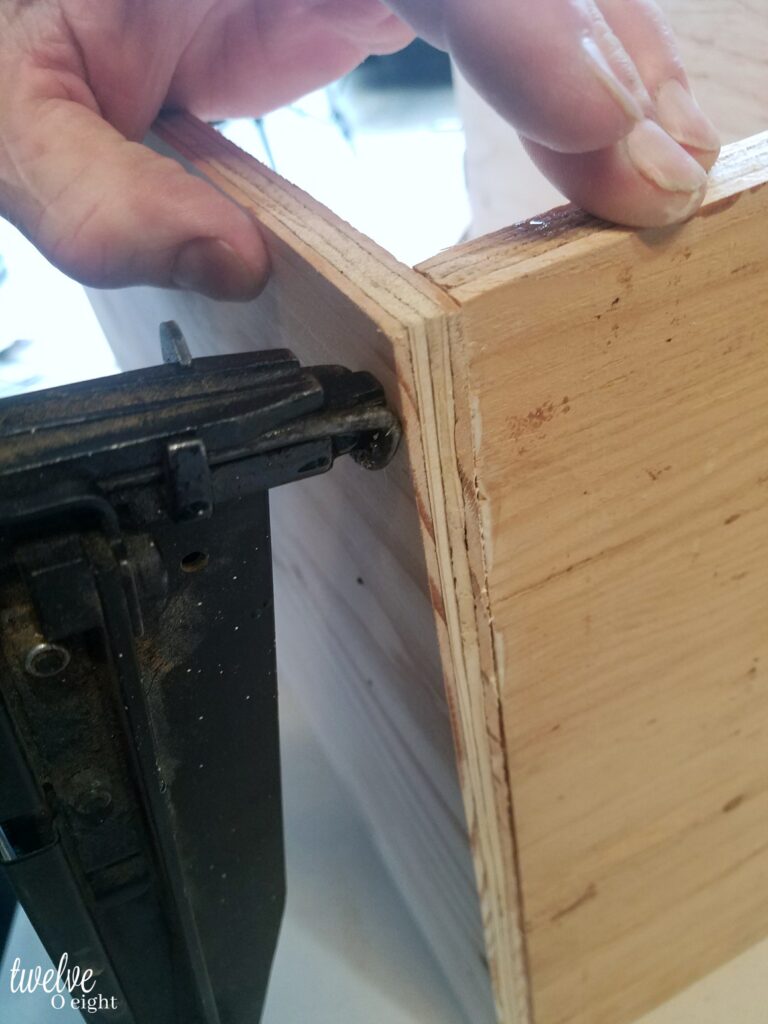
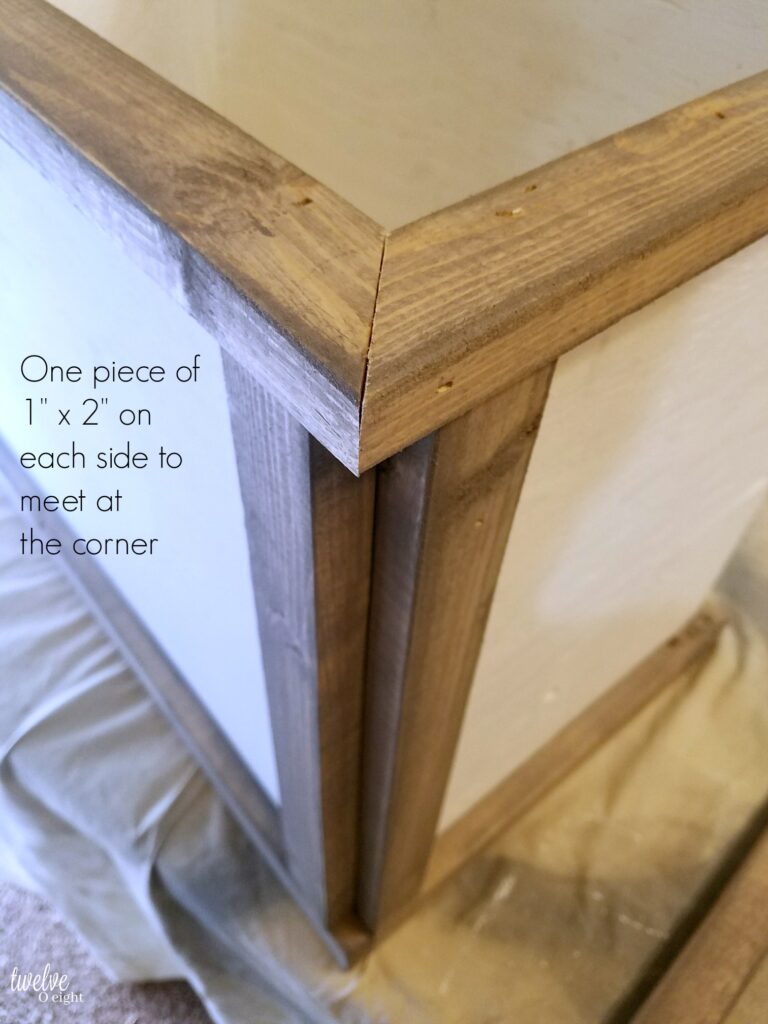
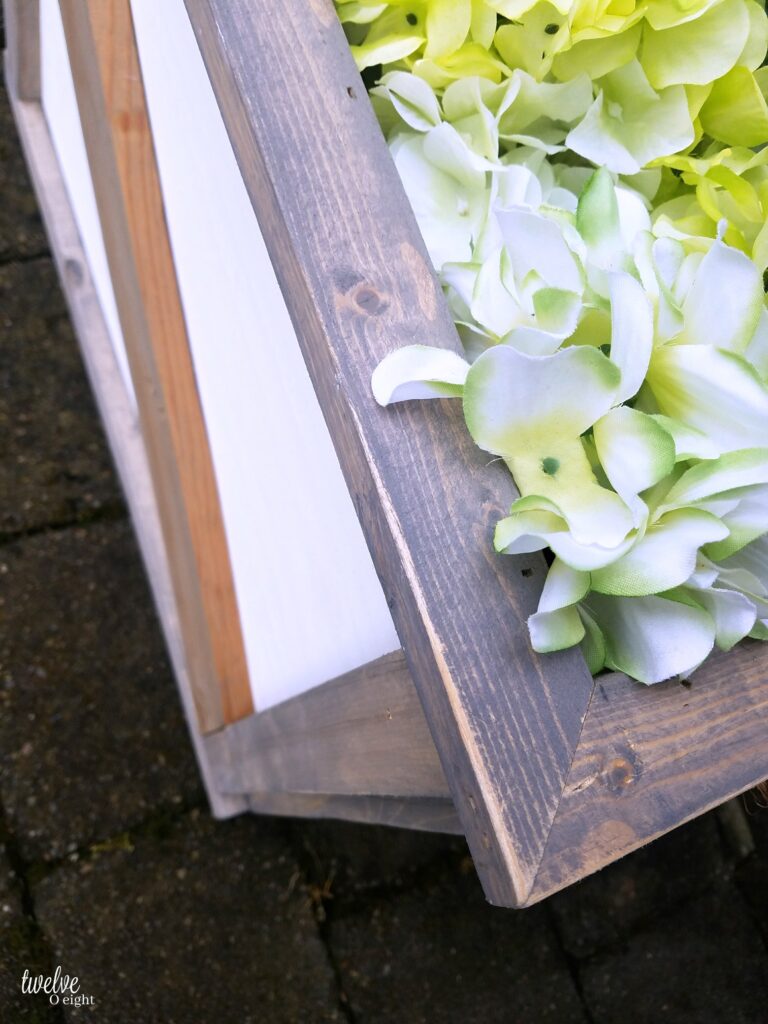
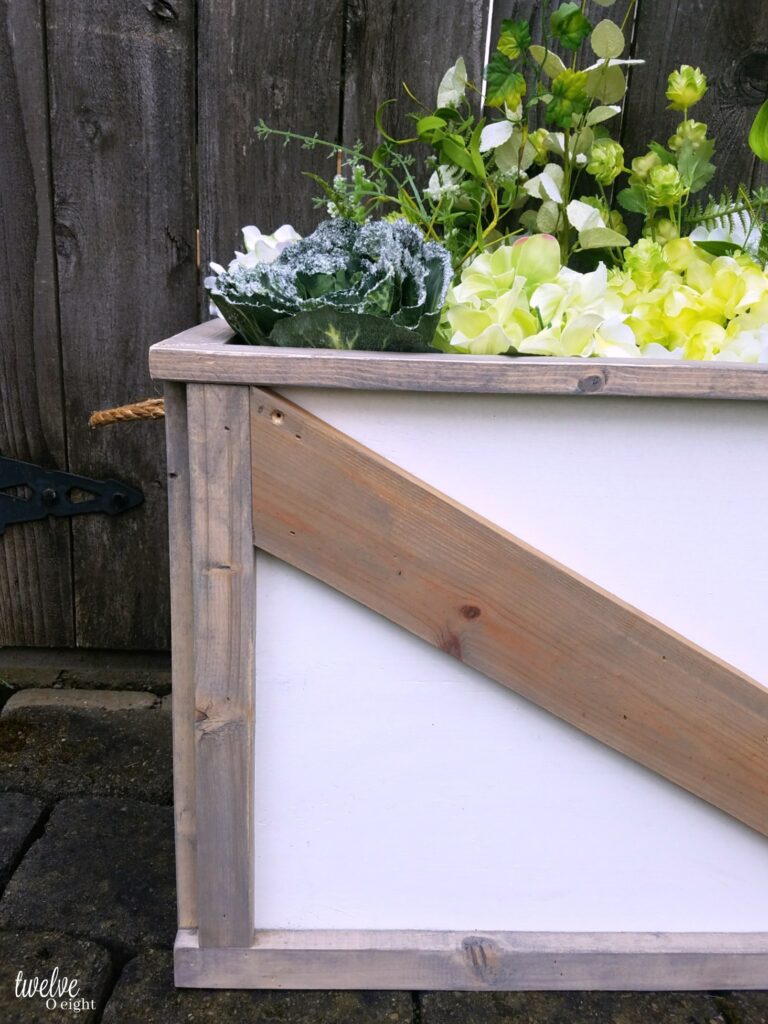
We began by cutting 5 pieces of plywood too create the “box” and used 1″ x 2″ around the top and bottom, using a 90 degree cut at the corners to create a base and top.
A thin line of wood glue applied along the edges before using the nail gun helps make the planter very sturdy.
We gave it two good coats of white chalk paint.
For the wood areas, we used pine, and stained with a light weathered grey stain.
We drilled holes for the sisal handles for each side of the box, and cut the 1″ x 4″ pieces for each side panel, using a nail gun we put each into place.
A light coat of matte poly spray sealer will keep the white from getting dirty, and from yellowing outside.
I kind of want one of these for every room in our house (I’m not sure Troy wants to make that many of them, but it doesn’t hurt to suggest right?)
Supplies:
- One half sheet of 3/4″ CDX plywood
- Two 1″ x 2″ x 8′ pine boards- 8 pieces each cut 15″ long for the corners and 4 pieces 25 5/8″ for the top and bottom front and back pieces. Four more 15″ pieces for the top and bottom on each end.
- One 1″ x 4″ x 8′ pine board- Cut one 26″ piece from point to point to fit into the front section at an angle to fit snugly. Cut at angle to fit one piece for each side 18 5/8″, use finish nailer to secure. (I left the back on mine without an piece of wood at an angle, but if you want one on the back just make sure you buy two of the 1″ x 4″ x 8′ boards.
- White chalk paint
- Weathered Grey stain
- Rags for stain
- Finish nailer and 1.25″ nails
- Drill with bit large enough to drill holes for sisal
- Sisal rope- 14″ or less for each handle
- Matte poly spray sealer (optional)
This was such a fast project to make, I was kind of surprised it only took a couple hours including paint and stain dry time!
I love how the white washed wood, grey stained wood and sisal all compliment each other so well.

Now for the warm weather and TONS of plants and flowers, I can’t wait.
Are you chomping at the bit for summer or waiting patiently?

I would love to hear how you prepare and decorate for the warmer months outside, leave me a comment and let me know!
Thank you so much for reading friend, as always, may your heart and home be full of everything you love…
xo, Tanya
![]()
![]()
![]()
![]()
![]()
![]()
![]()
![]()
linking up to: http://www.savvysouthernstyle.net/
And these awesome parties: https://twelveoeightblog.com/awesome-link-parties


13 Responses
This is gorgeous, Tanya! I’d want one in every room of my house as well. 🙂
Hi Tanya! I am featuring your fabulous planter box at Totally Terrific Tuesday tonight! We appreciate you linking up with us each week. I can’t wait to see what you link up next.
I was so excited to see the feature Sherry, thank you again!
xo
I completely love this, and the colors you painted it!
Thank you so much Nicki!! 🙂
Hugs, Tanya
Looking forward to reading more. Great article post.Really looking forward to read more. Keep writing.